Java J's on Monday Aug 2, 7-9pm.
I'm hearing that others are having problems with Shutterfly. I sent them a msg and we'll see what kind of response we get. We might be looking for another home again... I'm about ready to just buy a URL and pay for hosting so we don't keep going through this.
Saturday, July 31, 2010

Friday, July 30, 2010
accessories!
My daughter embroidered my new logo on a hand towel! I think I'll keep it in my case to wipe down my ukes. Pretty nice!


Sunday, July 18, 2010
Logo for my ukes?
I've been playing with the idea of a logo for my ukes.
Here is a pic of what I came up with.

It a stylized version of my initials. I took the K that I used for my tenor headstock, then I freehand digitally traced the outline of a uke picture for the backwards B. It was then resized/stretched to fit with the K and the soundhole/bridge added for the loops of the B. I added the 4 extended uprights and then cut/paste the peghead right from the old StrumMn logo and tweaked it to match.
It may be similar to other logos out there but nothing is copied from them.
I'm not putting it on the front of my headstocks but it may go on the back of the headstock or inside the uke.
I found a place that will do it as a 2cm x 2cm "branding iron" that clips right onto a Bic lighter so it can be burned in, I like the idea.
Here is a pic of what I came up with.

It a stylized version of my initials. I took the K that I used for my tenor headstock, then I freehand digitally traced the outline of a uke picture for the backwards B. It was then resized/stretched to fit with the K and the soundhole/bridge added for the loops of the B. I added the 4 extended uprights and then cut/paste the peghead right from the old StrumMn logo and tweaked it to match.
It may be similar to other logos out there but nothing is copied from them.
I'm not putting it on the front of my headstocks but it may go on the back of the headstock or inside the uke.
I found a place that will do it as a 2cm x 2cm "branding iron" that clips right onto a Bic lighter so it can be burned in, I like the idea.
Saturday, June 26, 2010
DONE!
Ok, the finish has sat for a week so now it's time to scrape it back and glue on the bridge.

Bridge glued, now tape it off for a quick coat of Teak Oil on the redwood bits.

Oil wet but tape removed so it won't wick underneath.

Trying to get a shot of the reflections... it's shiny!

Strung up and looking good, just needs the strings trimmed.

Lovin' the tail graft.

A minor issue here but I'm the only one who knows...

More Sheoak in the rosette turned out nice.

The zipper and skunk stripe line up perfect!

Grover friction tuners seem to work really well!

Time to play! The fretboard feels so much wider and the frets so far apart, this will take some gettin' used to, but it turned out nice and sounds good so far!

Bridge glued, now tape it off for a quick coat of Teak Oil on the redwood bits.

Oil wet but tape removed so it won't wick underneath.

Trying to get a shot of the reflections... it's shiny!

Strung up and looking good, just needs the strings trimmed.

Lovin' the tail graft.

A minor issue here but I'm the only one who knows...

More Sheoak in the rosette turned out nice.

The zipper and skunk stripe line up perfect!

Grover friction tuners seem to work really well!

Time to play! The fretboard feels so much wider and the frets so far apart, this will take some gettin' used to, but it turned out nice and sounds good so far!
Tuesday, June 22, 2010
sanding and polishing!
Tonight I wet sanded with 600, 1000, 1500, and 2000 grit. I would have gone to 4000 if the store had it.
Then I hit it with Maguire's rubbing compound. Still need to use their Scratch-X but boy, does it shine!
So, tomorrow night I "scratch" it, then attach the neck. Then I measure for bridge placement and remove the finish so I can glue on the bridge. After that it's pretty much just setup; filing nut slots, fitting tuners, etc.
I'm shooting to bring it this weekend to the Lil Rev workshop even if the strings are still stretching!
It's been a "long and winding road" on this uke but if it plays half as good as it looks I'll be thrilled, and with the tap tone and lightness I'm expecting it to be a great player anyway.
Then I hit it with Maguire's rubbing compound. Still need to use their Scratch-X but boy, does it shine!
So, tomorrow night I "scratch" it, then attach the neck. Then I measure for bridge placement and remove the finish so I can glue on the bridge. After that it's pretty much just setup; filing nut slots, fitting tuners, etc.
I'm shooting to bring it this weekend to the Lil Rev workshop even if the strings are still stretching!
It's been a "long and winding road" on this uke but if it plays half as good as it looks I'll be thrilled, and with the tap tone and lightness I'm expecting it to be a great player anyway.
Saturday, June 05, 2010
Letting finish rest before polishing
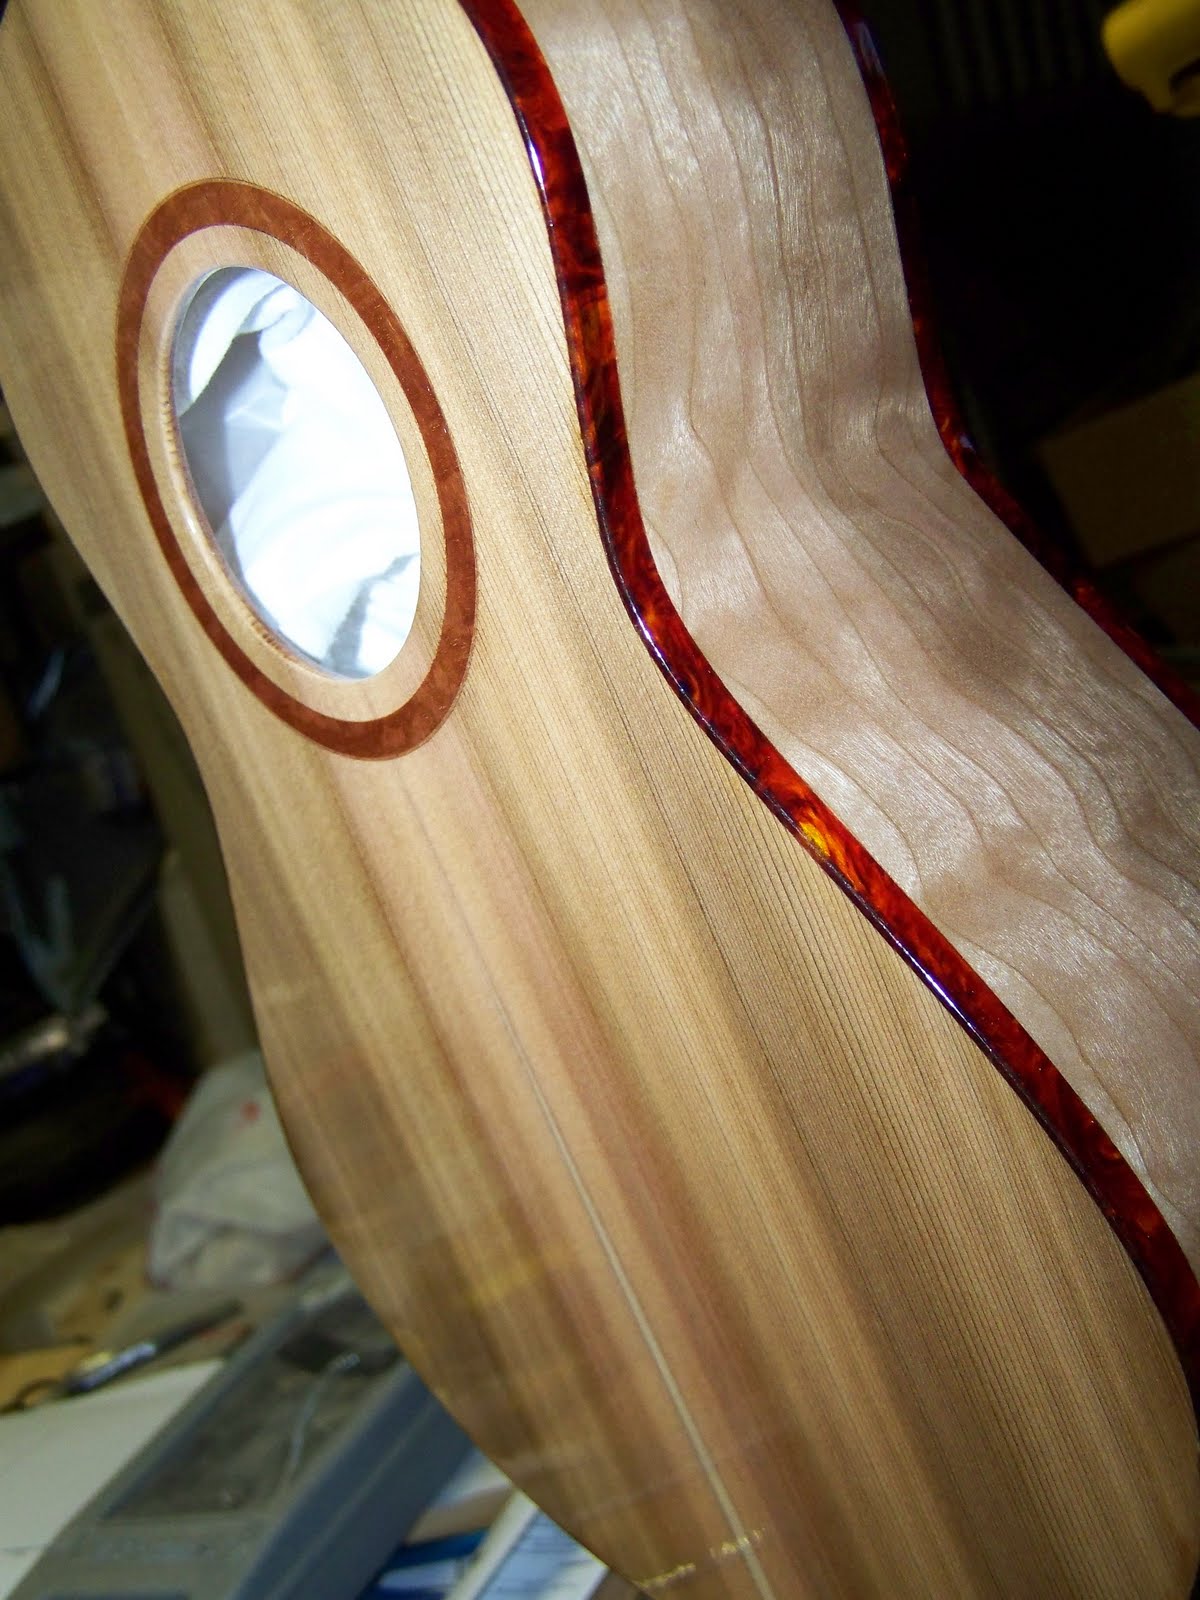
Have to wait a week before sanding with 600-2000 grit and polishing.
You can see a bit of reflection on the lower left. It really shines but isn't smoooooth yet.
It won't be quite like the mile thick commercial finishes but I think I'll be happy as long as I don't sand through!
Sunday, May 30, 2010
Spraying finish
Well I started spraying KTM-9 finish today, finally. I was a little paranoid and was putting it off until I had plenty of time to work through issues without rushing.
The first coat went well, I've got a run on the second that will need sanding. The 1st coat also really raised the grain and left it feeling rough so a little sanding after the 2nd coat dries will help anyway.
I've got pictures but it's tough to see anything, I'll review after I upload to my laptop and post any good ones. It's nice to get started on the finish after so long, I really want this complete early in June so I can have it strung up before the June 27 Lil Rev workshop.
I also shaped my rosewood bridge yesterday! I still need to drill holes (string through style) but it should work great! Pictures to come...
Brian
The first coat went well, I've got a run on the second that will need sanding. The 1st coat also really raised the grain and left it feeling rough so a little sanding after the 2nd coat dries will help anyway.
I've got pictures but it's tough to see anything, I'll review after I upload to my laptop and post any good ones. It's nice to get started on the finish after so long, I really want this complete early in June so I can have it strung up before the June 27 Lil Rev workshop.
I also shaped my rosewood bridge yesterday! I still need to drill holes (string through style) but it should work great! Pictures to come...
Brian
Saturday, April 24, 2010
Fretting about things... :-)
Fret slots cut. Using my new setup is really slick.

Frets installed but not yet trimmed. I had to use super glue as the slots are just a hair wider than previously. Also the fret wire came curved and my fretboard is flat so the wire wanted to pop up in the middle.

All trimmed up. I clip, file, and then sand to get the fret ends smooth and soft to the touch.

A new trick I learned if you look close. I put a couple staples in the neck and then clipped them off very short. The sharp nubs hold the fretboard in place while gluing so it doesn't squirm all over when clamping up.

Here you can see the corresponding holes in the bottom of the fretboard. I just located the fretboard and pressed it into place (ok, I had to use a clamp to drive the nubs in, that rosewood is HARD).

All clamped up and it didn't move a bit, this is slick! Thanks to Kathy Matsushita's blog for this trick.

Lookin' good! The glue cleanup was easier with this method too. Time for some final sanding and I'll be ready to spray a finish.

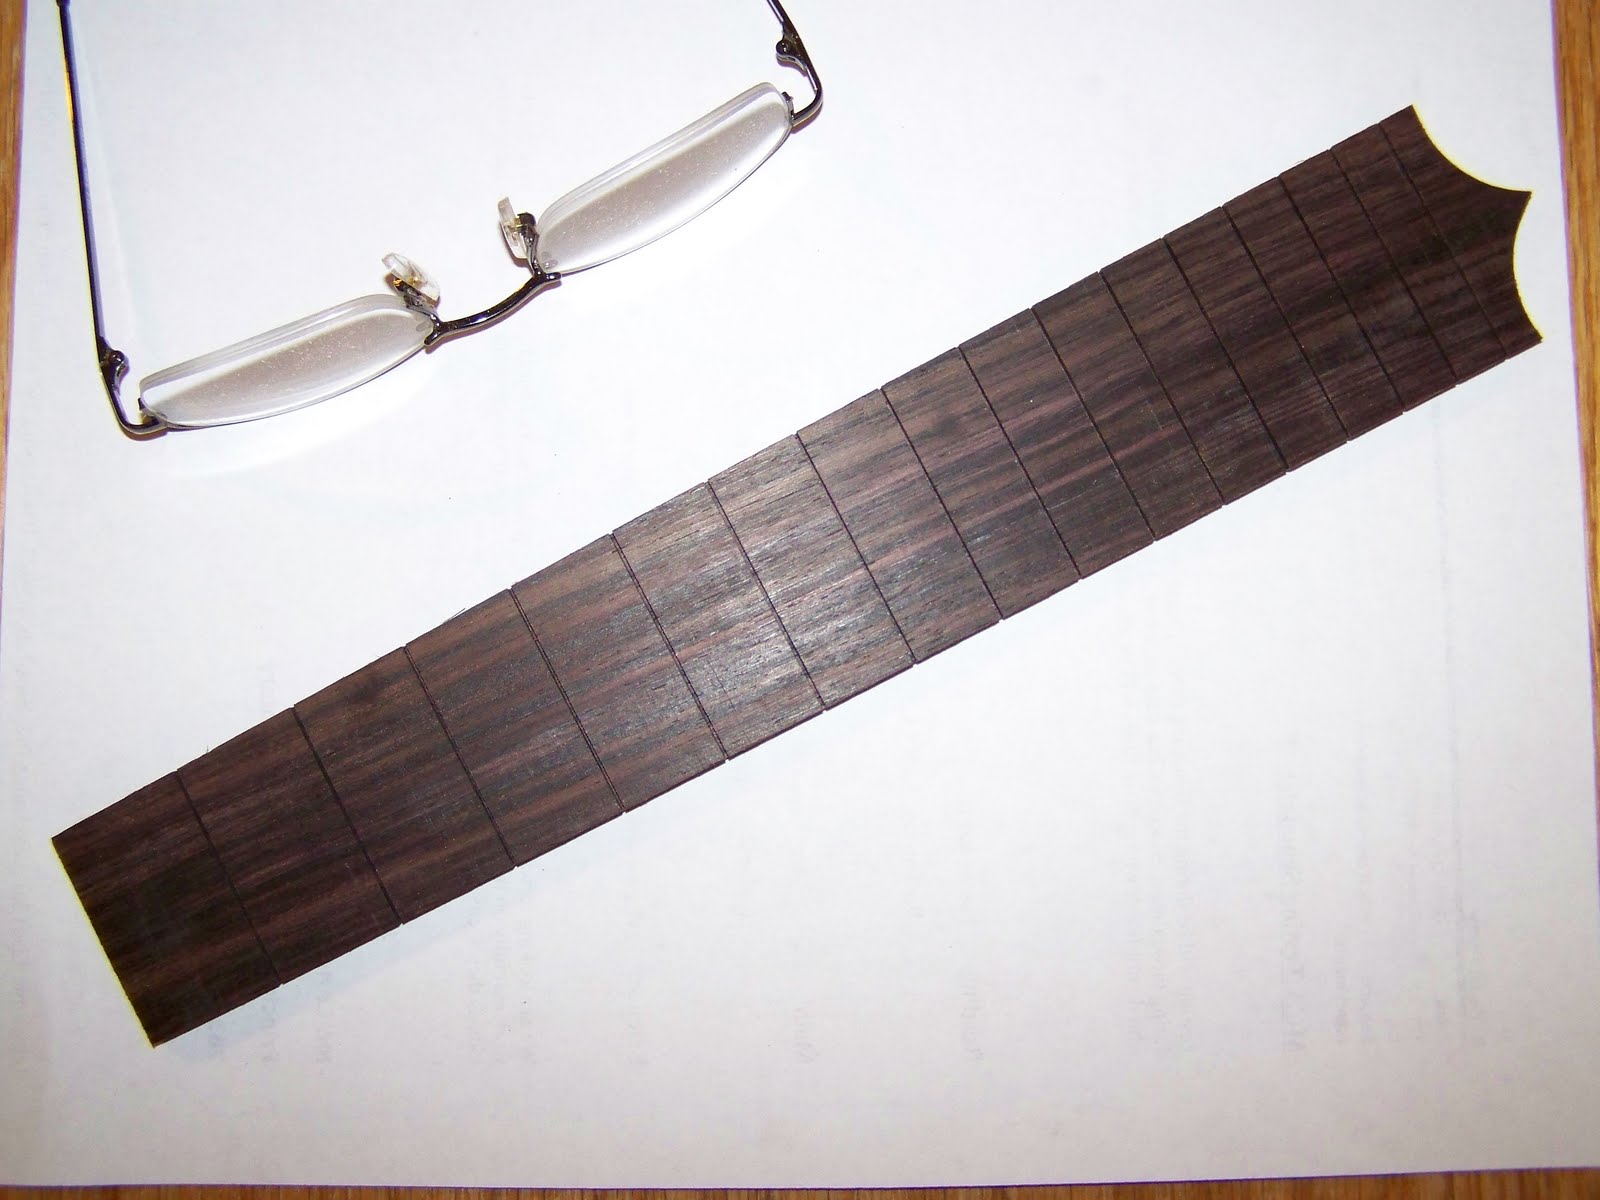
Frets installed but not yet trimmed. I had to use super glue as the slots are just a hair wider than previously. Also the fret wire came curved and my fretboard is flat so the wire wanted to pop up in the middle.

All trimmed up. I clip, file, and then sand to get the fret ends smooth and soft to the touch.

A new trick I learned if you look close. I put a couple staples in the neck and then clipped them off very short. The sharp nubs hold the fretboard in place while gluing so it doesn't squirm all over when clamping up.

Here you can see the corresponding holes in the bottom of the fretboard. I just located the fretboard and pressed it into place (ok, I had to use a clamp to drive the nubs in, that rosewood is HARD).

All clamped up and it didn't move a bit, this is slick! Thanks to Kathy Matsushita's blog for this trick.

Lookin' good! The glue cleanup was easier with this method too. Time for some final sanding and I'll be ready to spray a finish.

Sunday, April 11, 2010
1 step forward!
I'm finally back into the garage today and after some cleanup I was able to build a jig for fret slotting. Then I was able to slot a fretboard in just a couple minutes and it's perfect.
Building patterns for different scale lengths should also only take 5-10 minutes.
This is amazing. Next step will be to taper the fretboard and then put in the frets.
Before you know it I'll get this tenor finished up, it's been a long haul.
Building patterns for different scale lengths should also only take 5-10 minutes.
This is amazing. Next step will be to taper the fretboard and then put in the frets.
Before you know it I'll get this tenor finished up, it's been a long haul.
Tuesday, February 16, 2010
1 step forwards, 2 steps back
Well, I took an extra vacation day this past weekend with the hope of getting a few things accomplished. One of those was getting my fretboard slotted, frets set, and fretboard glued to the neck.
I've been putting it off, it's one of those mental block things. I've done it 3 times before and they turned out great but it's picky work and this time I was working with a pre-tapered board so my jig wasn't usable as in the past.
Anyway, I finally got to it yesterday and got it slotted, then set it aside. Today I gathered up my fretwire, hammer, and special fret-setting tool to "get 'er done" but before I got started I got a big surprize! Frets are supposed to get narrower as you go up the board but ONE of my slots was off. The pattern I use had slipped, along with the jig not lining up correctly on the tapered board.
It's ruined.
At least I noticed before fretting or gluing it up!
So... recovery time, what to do, how to proceed. No more of this hand cut slot stuff for me. I'm building a new jig and ordered a fretting blade for the table saw, serious stuff ($$), and a new rosewood blank that should do 2 ukes.
I also ordered some new wood, enough to do a guitar body (I've wanted to try making one but don't worry, ukes still come first), old growth sitka spruce and goncalo alves, should be sharp!
.


Brian
I've been putting it off, it's one of those mental block things. I've done it 3 times before and they turned out great but it's picky work and this time I was working with a pre-tapered board so my jig wasn't usable as in the past.
Anyway, I finally got to it yesterday and got it slotted, then set it aside. Today I gathered up my fretwire, hammer, and special fret-setting tool to "get 'er done" but before I got started I got a big surprize! Frets are supposed to get narrower as you go up the board but ONE of my slots was off. The pattern I use had slipped, along with the jig not lining up correctly on the tapered board.
It's ruined.
At least I noticed before fretting or gluing it up!
So... recovery time, what to do, how to proceed. No more of this hand cut slot stuff for me. I'm building a new jig and ordered a fretting blade for the table saw, serious stuff ($$), and a new rosewood blank that should do 2 ukes.
I also ordered some new wood, enough to do a guitar body (I've wanted to try making one but don't worry, ukes still come first), old growth sitka spruce and goncalo alves, should be sharp!
.


Brian
Tuesday, January 19, 2010
GRRR!!!
This site has been getting lots of spam comments lately so I've had to constantly search them out and delete them. So for a while I'm going to turn on comment moderation once again.
If you leave a comment it won't show up until after I've allowed it through which is usually once a day.
Another good reason for the StrumMn Ukulele Players to use the nexo forum instead for our communication.
Then again, it you have real comments on anything on this site I do love to hear from you, so don't hesitate to leave a note.
Brian
If you leave a comment it won't show up until after I've allowed it through which is usually once a day.
Another good reason for the StrumMn Ukulele Players to use the nexo forum instead for our communication.
Then again, it you have real comments on anything on this site I do love to hear from you, so don't hesitate to leave a note.
Brian
Tuesday, December 29, 2009
Monday, December 14, 2009
Next StrumMn meeting
Monday Dec 21st, 7-9pm at Java J's.
Probably heavy on the Xmas music but anything is fair game.
Hope to see you there!
Keep StrumMn!
Probably heavy on the Xmas music but anything is fair game.
Hope to see you there!
Keep StrumMn!
Saturday, December 05, 2009
Uke building delayed...
I had another project that was a long time a'coming.
I had built several finger jointed cedar boxes several years ago. My youngest daughter got the prototype and the others were auctioned to benefit the Lupus Foundation through my oldest daughters sorority in college.
My oldest has been kiddingly asking where HER box was, and she wanted it to be octogon instead of just rectangular like the rest.
Well, I went nuts; I built a jig, bought some aromatic cedar, bought some new saw blades so I could get a deep enough dado and went to town.
I didn't get any "in progress" pics but here is the finished product with an oil finish on the outside (raw on the inside to get the full cedar effect) and some woodburning on the lid (the design is stolen from the Brighton store at the MOA, they did it in mosaic tile in the store entrance).
Back to uke finishing next.


Saturday, October 31, 2009
Email from Paul in Samoa !
Hi Brian,
Sorry it’s been such a long time. Life has been busy. How are you? How are things in the States?
I don’t know where to start it’s been so long and so much has happened. I’m not sure if I have told you my situation? It’s been over a year now since I left. The first three months were very intense. I could talk about the training phase forever. Some very good times and so very challenging things happened in those three months.
After graduating from training I was placed in my post. I’m on Savaii (the big island) in a district named Satupaitea on a Methodist school compound. The compound is sandwiched between the village of Vaega and Satufia if you want to look it up. The island is very beautiful and very peaceful. My position is a college (high school) teacher. The subjects are automotive mechanics, social studies, geography and English. The main reason I was brought here for was to teach automotive, but as in everything Samoa you need to be flexible that’s how I acquired the other classes.
The kids are great. Far different from the youth of America, not all the kids are great, of course there are a few bed ones here or there. The structure of the school day is much different than at home. Time isn’t valued that much here and not looked at equally. The other big difference is the priority of education. I would say it’s around forth or fifth. With that being said the education of the average Samoan student is very low. Not only is it low, but the worst part is that they don’t really have the ability to critically think.
Life moves pretty slow, not much big things happen, with the exception of the recent tsunami and earthquake activity that has been happening ever since. My internet availability is pretty poor. My island has one computer with dial up internet that does not work all the time. As of today we have a new office computer that we have been waiting computer less for 2 months now.
The travel situation is pretty rough. I have a bike that I use often, but it’s usually to hot. There are buses that run in the morning and afternoon, but they are often unreliable. Especially my bus! I have to take a boat to get to the other island. All together it takes about 5 hours to travel from my village to Apia. The good thing about it is that it keeps me in my village. Apia is nice to go to every once in a while, but I’m glad I don’t live there.
The language is great. I had a very tough time at first. Then one day it just clicked and I started understanding it. I tested at intermediate-high at the end of training and my language skills have improved a lot since then. Learning a second language is great. I took Spanish in high school but I was never at the level I’m at with Samoan. The bad part is when I go back there won’t be many opportunities to use it. That’s ok though. My language ability is one of the things that I’m proudest about in my life. The down side is that my English has suffered but I can get that back pretty quick.
In my free time, which I don’t have much of is usually spent with friends, or fishing oh and of course my guitar. I had a uke, but my students broke it. Surprisingly it is very hard to find a uke here. If you do find one it is usually ridiculously cheap, poor quality Chinese product.
I will be going back to the States in Dec./Jan. for a few weeks. If you want to schedule a StruMN get together somewhere in there I would love to go. If it doesn’t work out don’t worry about it. I’m very flexible with the dates and times if that helps. My ukulele skills have weakened but my guitar skills have increased a lot. Either way I should be able to hold my own. It would be nice to dust off that nice Ohana that I picked up at the Uke Fest last year. Tell everyone I say hi!
I better get going now. Thanks for sending me the email. I really appreciate it. Sorry it has taken me so long to get back to you. Communication should be a little easier now with the new computer in the Savaii office and you know the best email address to reach me at. Please get back to me when you get some free time.
Take care, Paul
Sorry it’s been such a long time. Life has been busy. How are you? How are things in the States?
I don’t know where to start it’s been so long and so much has happened. I’m not sure if I have told you my situation? It’s been over a year now since I left. The first three months were very intense. I could talk about the training phase forever. Some very good times and so very challenging things happened in those three months.
After graduating from training I was placed in my post. I’m on Savaii (the big island) in a district named Satupaitea on a Methodist school compound. The compound is sandwiched between the village of Vaega and Satufia if you want to look it up. The island is very beautiful and very peaceful. My position is a college (high school) teacher. The subjects are automotive mechanics, social studies, geography and English. The main reason I was brought here for was to teach automotive, but as in everything Samoa you need to be flexible that’s how I acquired the other classes.
The kids are great. Far different from the youth of America, not all the kids are great, of course there are a few bed ones here or there. The structure of the school day is much different than at home. Time isn’t valued that much here and not looked at equally. The other big difference is the priority of education. I would say it’s around forth or fifth. With that being said the education of the average Samoan student is very low. Not only is it low, but the worst part is that they don’t really have the ability to critically think.
Life moves pretty slow, not much big things happen, with the exception of the recent tsunami and earthquake activity that has been happening ever since. My internet availability is pretty poor. My island has one computer with dial up internet that does not work all the time. As of today we have a new office computer that we have been waiting computer less for 2 months now.
The travel situation is pretty rough. I have a bike that I use often, but it’s usually to hot. There are buses that run in the morning and afternoon, but they are often unreliable. Especially my bus! I have to take a boat to get to the other island. All together it takes about 5 hours to travel from my village to Apia. The good thing about it is that it keeps me in my village. Apia is nice to go to every once in a while, but I’m glad I don’t live there.
The language is great. I had a very tough time at first. Then one day it just clicked and I started understanding it. I tested at intermediate-high at the end of training and my language skills have improved a lot since then. Learning a second language is great. I took Spanish in high school but I was never at the level I’m at with Samoan. The bad part is when I go back there won’t be many opportunities to use it. That’s ok though. My language ability is one of the things that I’m proudest about in my life. The down side is that my English has suffered but I can get that back pretty quick.
In my free time, which I don’t have much of is usually spent with friends, or fishing oh and of course my guitar. I had a uke, but my students broke it. Surprisingly it is very hard to find a uke here. If you do find one it is usually ridiculously cheap, poor quality Chinese product.
I will be going back to the States in Dec./Jan. for a few weeks. If you want to schedule a StruMN get together somewhere in there I would love to go. If it doesn’t work out don’t worry about it. I’m very flexible with the dates and times if that helps. My ukulele skills have weakened but my guitar skills have increased a lot. Either way I should be able to hold my own. It would be nice to dust off that nice Ohana that I picked up at the Uke Fest last year. Tell everyone I say hi!
I better get going now. Thanks for sending me the email. I really appreciate it. Sorry it has taken me so long to get back to you. Communication should be a little easier now with the new computer in the Savaii office and you know the best email address to reach me at. Please get back to me when you get some free time.
Take care, Paul
Sunday, October 18, 2009
Neck attachment time.
To attach the neck I needed to drill parallel to the body, NOT perpendicular to the top surface of the neck. To do this I clamped the neck to this jig, doing t this way allowed me to line up the brad point bit right in the center of the maple strip of my neck.

The bit tracked straight! I was a bit worried about this since I was just using the spring clamps.
I also wrapped the neck with a bit of rubber carpet backing to both protect it and help keep it from shifting.

Here it is all bolted on (temporarily).


The bit tracked straight! I was a bit worried about this since I was just using the spring clamps.
I also wrapped the neck with a bit of rubber carpet backing to both protect it and help keep it from shifting.

Here it is all bolted on (temporarily).

Tuesday, September 15, 2009
half hour cabinet scraper workout
It was still warm and muggy outside but I sat in the yard and worked up a sweat tonight.
I thought the sides were looking pretty tough but a half hour with the cabinet scraper followed by a minute or two with some 100 grit and I'm a happy guy! I'll still need to work through some finer grits but this is very encouraging. I love how it looks and the tap tone is good. The top and sides are under 0.070" and I tried hard not to over brace it. I'm going for a lightweight, good sounding uke... in other words I'm trying VERY hard NOT to over build it. Just had to share!


I thought the sides were looking pretty tough but a half hour with the cabinet scraper followed by a minute or two with some 100 grit and I'm a happy guy! I'll still need to work through some finer grits but this is very encouraging. I love how it looks and the tap tone is good. The top and sides are under 0.070" and I tried hard not to over brace it. I'm going for a lightweight, good sounding uke... in other words I'm trying VERY hard NOT to over build it. Just had to share!


Sunday, September 13, 2009
top binding in place
Here it is with the binding taped on and already glued. I tape the binding on first, using a hair dryer to heat the binding and help it bend in the tight waist and upper bout curves. After it was taped on I applied the CA super glue in the gaps, the glue wicked under the binding... and unfortunately under the tape too. But that was why I'd applied the Shellac yesterday! After applying the glue I also added additional tape and pressure using tools on hand until the glue set.

After the glue was dry I removed the tape and here you see the mess of adhesive soaked super glue. A pain in the butt to clean up, but do-able.

Almost all cleaned up and looking good! I think normal sanding will take care of it from here.

Now that both top and back binding is in place I still need to clean up the sides which is a little tougher but hopefully not too bad. There isn't as much glue or adhesive but I'll also be sanding/scraping the wide surface of the binding which may be touchy, we'll see!


After the glue was dry I removed the tape and here you see the mess of adhesive soaked super glue. A pain in the butt to clean up, but do-able.

Almost all cleaned up and looking good! I think normal sanding will take care of it from here.

Now that both top and back binding is in place I still need to clean up the sides which is a little tougher but hopefully not too bad. There isn't as much glue or adhesive but I'll also be sanding/scraping the wide surface of the binding which may be touchy, we'll see!

Saturday, September 12, 2009
StrumMn meetup at Java J's
Don't forgat that we're meeting up at Java J's on Monday Sept 14th. Visit StrumMn.Nexo.com for details.
Binding
I want to try my hand at putting binding on this uke. To do this I built a new jig/tool last weekend. I had to do some ugly welding (I'm out of practice) and mount this angled piece to a heavy duty drawer slide (from Axman's). The router is then kept verticle and I can keep both hands on the uke body. I tried it out last night and it worked pretty well.

Here you can see a wood guide I added to the bottom. This is necessary because of the radiused top and back, otherwise the router bit wouldn't keep the right distance from the top. You can see I added my routing directions so I would do things right.

I also decided to try my hand at inlay for the headstock. This is my first ever attempt. Here are my initials (minus the verticle on the left side), I'm leaving that off to be "artsy."

Here the binding channels are complete. I decided against purfling this time, maybe on the next one.

In this shot I've already started removing the tape. I first tried some special glue made just for plastic binding but the work time is so quick that I started to make a mess of it and had to remove it, clean up the channels and start over. I stopped to research things some more and ended up using CA glue instead (super glue). It left a real mess to clean up as it wicked under the tape and across the back.

Here is the back, all bound, and mostly cleaned up. I won't clean up the sides until I finish binding the front.

The back was such a mess that I'm afraid the CA will really wick into the Western Red Cedar top. I stopped and went to the store and bought some shellac. I'm hoping this will seal the grain a bit so the glue won't wick in but still allow it to adhere well. Then I'll sand the shellac completely off after the binding is on. This also gives a little preview of how the top will look with some finish on it... I like it!

I love the look of tortoise binding but I'm getting the idea that plastic binding in general can be a pain in the butt! With wood binding I could just use Titebond and work it like normal. We'll see if the extra effort is worth it when it's complete.

Here you can see a wood guide I added to the bottom. This is necessary because of the radiused top and back, otherwise the router bit wouldn't keep the right distance from the top. You can see I added my routing directions so I would do things right.

I also decided to try my hand at inlay for the headstock. This is my first ever attempt. Here are my initials (minus the verticle on the left side), I'm leaving that off to be "artsy."

Here the binding channels are complete. I decided against purfling this time, maybe on the next one.

In this shot I've already started removing the tape. I first tried some special glue made just for plastic binding but the work time is so quick that I started to make a mess of it and had to remove it, clean up the channels and start over. I stopped to research things some more and ended up using CA glue instead (super glue). It left a real mess to clean up as it wicked under the tape and across the back.

Here is the back, all bound, and mostly cleaned up. I won't clean up the sides until I finish binding the front.

The back was such a mess that I'm afraid the CA will really wick into the Western Red Cedar top. I stopped and went to the store and bought some shellac. I'm hoping this will seal the grain a bit so the glue won't wick in but still allow it to adhere well. Then I'll sand the shellac completely off after the binding is on. This also gives a little preview of how the top will look with some finish on it... I like it!

I love the look of tortoise binding but I'm getting the idea that plastic binding in general can be a pain in the butt! With wood binding I could just use Titebond and work it like normal. We'll see if the extra effort is worth it when it's complete.
Subscribe to:
Posts (Atom)