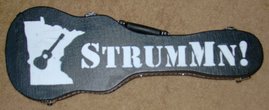
This blog is for Gary. He likes reading about the Como happenings since he can't make it. But tonight he was there! Along with David, Tom, and myself. It was a beautiful evening to sit out there and play, at least until the mosquitos came out at about 8:45 and we cut it short.
We had some teenagers stop and listen for a few minutes and then ask us what kind of band we were. Gary told 'em the truth but should have said we were the Fab Four. :-)
We played through some good tunes that Gary had along and then David worked us through an arrangement of "You are so Beautiful" that he is putting together. I can't wait to get a copy from him, he only had his one working copy along tonight. He even taught us a new chord, I called it "David's chord" but he's going with the FSTC chord (that's F-Shaped Tone Cluster for those not there.)
We also talked a little about the Windy City Uke Fest coming up on Aug 1,2,3. David and I are going to head over there and check it out. Let us know if any other StrumMn'rs are going.
(Maybe Curt Sheller can tell us the real name of the FSTC while we're there!)
I'll get a date for our next meeting soon, most likely a Monday night in 2-3 weeks.
See ya!
Brian
Monday, June 23, 2008
Sunday, June 22, 2008
1st radius dish done
Radius dishes are expensive, somewhere on the order of $85 apiece. The wood is about $8.
I built a jig and patterns for 4 different radii; 8ft, 12ft, 15ft, and 25ft. I decided to do the 12ft first. This is a tedious and messy undertaking! Many passes with the router later and a little sanding with the orbital sander and it's looking good!
I think I have a good 2 hours labor in the dish though, not counting building the jig, etc. At least the jig and patterns can be re-used in the future. I'm also making my dishes 24" diameter so they're big enough to do a guitar in the future if I wish.
For those that don't know, radius dishes are used to curve the tops and backs of guitars and ukes.
They can be lined with sand paper to help shape the internal braces, and to sand the top/bottom of the side pieces to match the curve in the top and back, this gives a better glue joint.
The tops and back are also placed in the dish when the braces are glued in, this helps hold everything in place with the correct curve. The dish is placed in a "go-bar" fixture to help with this, google it if you're interested or just wait until I get to that point and I'll include pictures (I have to make it still but their are some freebie alternatives too).
Ready for some pictures?
In this first picture I'm just getting set to start routing. You can see that the router rides on the 2 radiused pattern pieces that just slide into slots at the ends of the jig. The dish turns on a peg in the middle. This is going to take a while and be very loud and messy. I held the router with one hand and the shop vac hose with the other. I also used eye protection, a dust mask, and hearing protection since this took quite a while to complete.

I'm part way done with the routing in the second picture... you can see the dishing under the jig!
In this last one, I've finished routing and sanding. I placed half of the 8ft pattern across the top so you have a straight bottom edge to help visualize the dish. The peg in the middle it to help spin the dish as it's routed. It's a piece of dowel so the router can just cut it too as it goes by. It sticks out more than 1/2" when I measured.
That's it for now.
I hope to see some of you Monday June 23 at Como for some uke playing.
Keep StrumMn this summer!
Brian
Tuesday, June 17, 2008
Ukin' Monday 6/23, 7-9pm
Come on over to the Como Pavillion on Monday 6/23 for some informal strummn. We'll either sit inside the Black Bear Crossings Cafe (inside the Pavillion) or find somewhere to sit nearby outside.
Last time we sat in the upstairs seating so remember to check there if you don't see us elsewhere.
Hope a few of you can make it!
Last time we sat in the upstairs seating so remember to check there if you don't see us elsewhere.
Hope a few of you can make it!
Sunday, June 01, 2008
Recap 6/1 & Summer ukin'
First off, great turnout on June 1st! Eight of us, 4 returning and 4-1st timers. Tim was a guest from the Berkley Ukulele club, in town for a conference and spent a couple hours with us. Thanks to everyone who made it!
Don brought his first homemade uke, looked and souned great, I can only hope mine turns out as well.
George brought his brand spankin' new William King custom, some of the prettiest koa I've laid eyes on... and the sustain!
David outdid himself with a huge selection of great music for us to play through. Thanks, Dave!
Hope to see Bill, Paul, and Susan back again too!
==================================
Now for the rest of the summer. What works for the rest of you? I think we'll stick to evenings, 7-9pm probably. Mondays or Fridays probably work best for me but majority will rule.
What does your schedule look like? What days could/would you show up?
Happy ukin' aand keep StrumMn everyone!
Brian
Build pics
As promised, some build-in-progress pictures.
This wood is labeled "lace" but I think it was called "Sheoak" in the ebay auction. I t came from Australia and was meant to be a guitar set. The guitar side broke in shipment but I had enough for top/back/sides for a soprano uke. I have no idea if this wood will make a good uke top, we'll just wait and see I guess.
Top/back are glued up bookmatched here and one set has been sanded.

The next pictures is the two side pieces, edge to edge, ready to go into the side bender. They're wet down and the grain is really gorgeous!

My first bend ever! The thermometer never got up were I wanted and expected so I just listened for cracking and slowing brought in the waist...

Here it is cooking in the bender. There is a 500 watt halogen bulb in there, seems to be plenty hot!

I let them sit in the bender all night and put them in my mold this morning. There is some trimming to do (on purpose) but it's looking great to me so far!

I'll add more pics when I make more progress.
Brian
This wood is labeled "lace" but I think it was called "Sheoak" in the ebay auction. I t came from Australia and was meant to be a guitar set. The guitar side broke in shipment but I had enough for top/back/sides for a soprano uke. I have no idea if this wood will make a good uke top, we'll just wait and see I guess.
Top/back are glued up bookmatched here and one set has been sanded.

The next pictures is the two side pieces, edge to edge, ready to go into the side bender. They're wet down and the grain is really gorgeous!

My first bend ever! The thermometer never got up were I wanted and expected so I just listened for cracking and slowing brought in the waist...

Here it is cooking in the bender. There is a 500 watt halogen bulb in there, seems to be plenty hot!

I let them sit in the bender all night and put them in my mold this morning. There is some trimming to do (on purpose) but it's looking great to me so far!

I'll add more pics when I make more progress.
Brian
Subscribe to:
Posts (Atom)


